Alcohol Ink Drawing: Vivid Colour with Soft Control
Alcohol ink is a dye carried in alcohol, and it does not behave like the paint most of us grew up with. It flows, spreads and blends on its own with almost no encouragement, which makes alcohol ink drawing feel less like painting and more like guiding colour across a glossy surface.
The colour is intense, the drying is quick, and mistakes are unusually easy to lift away. Once you understand how the ink moves, the medium stops feeling unpredictable and starts feeling playful.
Why Alcohol Ink Behaves Differently
Watercolour sinks into paper and stays where you put it. Alcohol ink does the opposite: it sits on top of a sealed surface and keeps moving until the alcohol evaporates.
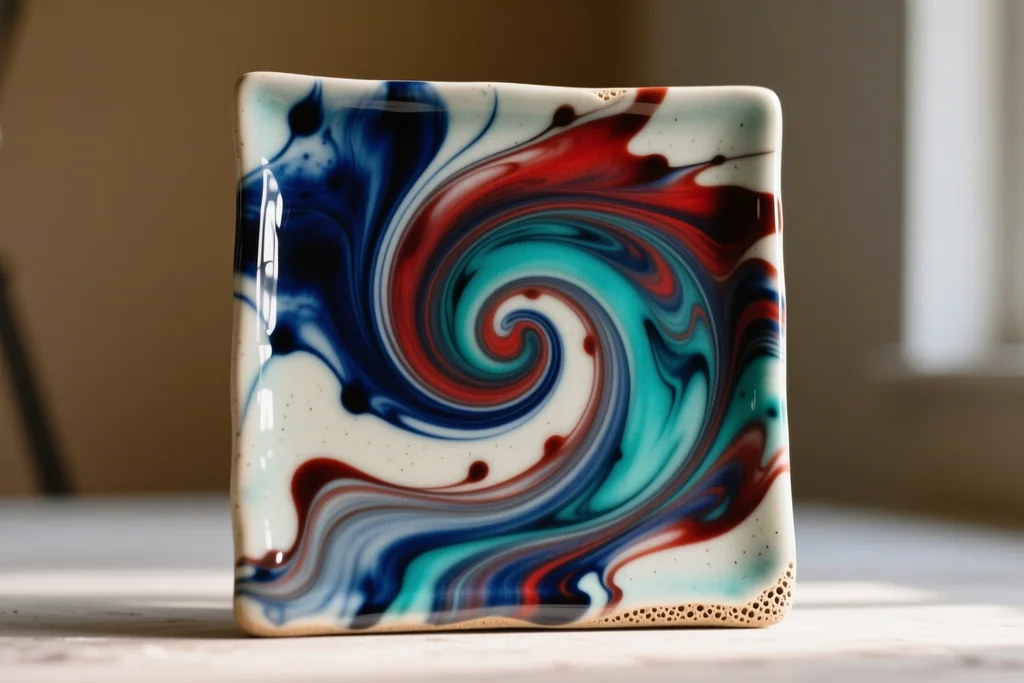
That is the whole secret of the medium. While the surface is wet, you can tilt it, blow on it, add more ink or let drops chase each other into soft clouds of colour.
Once the alcohol has gone, the dye is fixed where it dried. It will not run or bleed, and the colour stays as bright as the moment it settled.
Surfaces That Let the Ink Move
Smooth, non-porous surfaces give the best results. Synthetic paper, glossy photo paper, glazed ceramic tiles, glass and metal all let the ink slide across the surface instead of soaking in.
Absorbent paper, such as watercolour paper or cartridge paper, drinks the alcohol before it can travel. The colour goes flat and dull almost immediately, which is rarely what you want.
Choose the surface before you plan the picture. A tile holds bold, jewel-like colour and can be sealed and displayed as it is. Paper is lighter, easier to frame and a little more forgiving of a wash of diluted ink.
The Tools Worth Having Beside You
You need very little to begin, and most of it is already in the house. The one purchase worth making is a bottle of blending solution or isopropyl alcohol, which thins the ink and re-wets a patch that has started to dry.
- Pipettes or droppers for placing ink in controlled drops.
- Brushes you do not mind staining, for dragging colour into corners.
- A hairdryer on the cool setting to push ink across the surface.
- Cotton swabs for lifting colour and cleaning edges.
- Disposable gloves and a plastic sheet or craft mat to protect the table.
Keep the bottles capped between drops. Alcohol evaporates from an open bottle quickly, and a thick ink is much harder to control than a fresh one.
Alcohol ink is solvent-based, so open a window or take the project outside on a mild day. Wear gloves and cover the table, because the dye stains skin and tabletops cheerfully and does not come out of fabric.
Keep the ink away from anything you might eat or drink from. A shallow tray lined with a plastic sheet keeps the bottles together and the worktop safe.
Five Techniques That Do Most of the Work
Almost every alcohol ink picture is built from the same handful of moves. Practise them on a spare tile until each one feels familiar, then combine them freely.
| Technique | What it does | What you use |
|---|---|---|
| Drops | Places concentrated colour in one spot | Pipette or dropper |
| Tilting | Stretches drops into long flowing shapes | Your hands, or a small wedge under the tile |
| Blowing | Sends colour outward in fine rays | Hairdryer on cool, or a drinking straw |
| Layering | Builds depth by adding ink over dried ink | A dried first pass and fresh drops |
| Diluting | Softens edges and lightens a heavy patch | Blending solution or isopropyl alcohol |
Start with two colours rather than six. A single warm and a single cool tone will teach you more about blending than a whole box of bottles opened at once, and the results are usually cleaner.
Compositions That Suit the Medium
Alcohol ink favours loose, abstract subjects. A landscape built from three bands of colour, a burst of petals or a circle of repeated dots all sit naturally within the way the ink moves.
Soft horizons, moonlit water and misty hills work beautifully because the blurred edges do the work for you. A crisp, detailed portrait asks for a level of control the medium actively resists.
Work smaller than you think you need to at first. A postcard-sized tile is enough to hold a whole landscape and keeps the ink within reach while it is still wet.
Leave space for the surface to breathe. An area of plain tile or paper between two pools of colour gives the eye somewhere to rest and makes the bright patches look brighter.
Drying, Sealing and Displaying
Let the piece dry flat and undisturbed. Touch it too early and you will lift colour onto your finger and leave a pale print behind.
On tile or glass, a spray sealant or a pour-on resin finish protects the surface and lets you wipe it clean. On paper, frame the work behind glass so nothing rubs against it.
Keep finished pieces out of strong, direct sunlight. Display them in a room you actually sit in, where you can see the colour change as the light moves across the surface.
A Gentle Way to Start
Alcohol ink drawing is at its best when you treat the first attempts as experiments rather than finished work. Drop, tilt, blow, add a second colour, and see what happens.
If you dislike the result, drop on a little alcohol and move the colour again. Nothing is permanent until it dries, and even then you can work over the top of it.
Keep the pieces you like and cover the table before you begin. This is one of the few crafts where the process is genuinely as enjoyable as the finished picture.