Wet-on-Wet Watercolour: The Raw Painting Technique
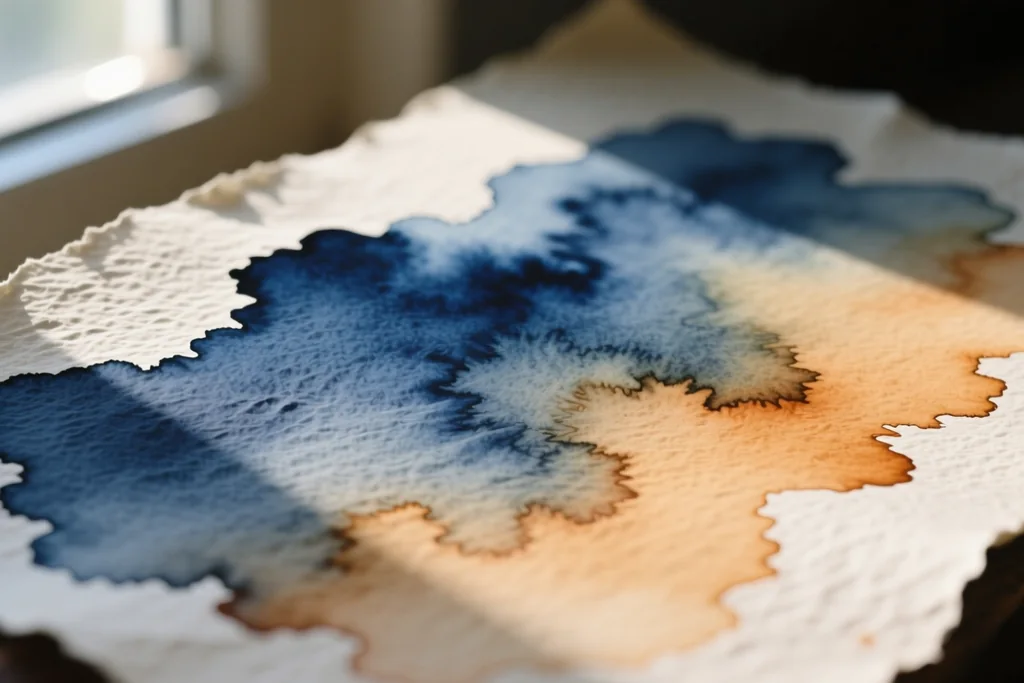
Wet-on-wet watercolour is the technique behind every soft evening sky and misty shoreline you have admired in a painting. Instead of drawing on dry paper, you wet the paper first and let the paint find its own edges.
The archive files call it the raw painting technique, and the name fits. The paper has to be raw and wet when the brush arrives, and the result is colour that melts into colour without a single hard line.
What Makes This Different From Ordinary Watercolour
Most watercolour work is painted onto dry paper, which holds a crisp edge wherever the brush stops. Wet-on-wet removes that edge entirely, because there is nothing to stop the pigment travelling.
Wet on wet watercolour is therefore a technique of atmosphere rather than detail. It is the right choice for skies, water, fog, distant hills and any subject where the shape is soft.
If you have ever felt that your watercolours look stiff and outlined, this is the technique that loosens them up again.
Paper, Paint and Water
Heavy watercolour paper is the foundation. A thick sheet holds the water without buckling, and the surface texture keeps the washes from looking flat.
Use proper watercolour paint rather than a cheap school set. Poor pigment separates as it spreads, and the lovely smooth transitions turn muddy instead of clean.
A wide, soft brush is what you need for wetting the sheet, with a smaller round brush for placing colour. Keep two jars of water: one for clean water and one for rinsing, so your washes stay bright.
Tape the paper to a board so it cannot curl, and tilt the board slightly forward so the wet colour moves downward instead of pooling where you sit. Mix every tint you expect to use before the first brush touches the sheet.
How Much Water Is Enough
The hardest part of wet on wet watercolour is judging the dampness of the paper. Too dry and nothing spreads; too wet and the colour floods into shapeless puddles.
Watch the surface rather than the clock. The sheen tells you where you are, and it changes faster than you expect on a warm day or near a radiator.
Keep a sponge and a clean jar beside the board. If the paper dries before you are ready, a light pass with clean water brings the shine back without disturbing the paint.
| How the paper looks | What happens to the paint | What it is good for |
|---|---|---|
| Wet and shiny, almost glassy | Colour races outward and blooms | Skies, clouds and misty backgrounds |
| Damp, with a soft matte sheen | Colour spreads gently and stays put | Hills, water and soft shapes |
| Nearly dry, cool to the touch | Edges begin to hold | Foregrounds and gentle definition |
Paint the background first while the sheet is wettest, then move forward as it dries. That single habit prevents the fine shapes you want to keep from blurring into the sky behind them.
Loading the Brush and Letting Go
Load a brush with plenty of mixed colour and touch it to the damp surface in one confident stroke. Dab with the tip and the wash will sit where it lands instead of flowing away.
Stop correcting. Every extra brush stroke flattens the soft transition you were trying to create, and the paper remembers every one of them.
To blend two colours, add the second tint while the first is still wet and let the sheet do the mixing. Tilt the board gently and the two will meet on their own.
Textures, Whites and Rescue Work
Plain washes are lovely, but a few small additions give the picture depth. Sprinkling a little salt into a damp wash pulls the colour aside and leaves pale freckles behind.
Masking fluid keeps a white shape clean while you flood the area around it. Let the paint dry fully before you rub the fluid away with a clean finger or a soft eraser.
- Drop clean water into a damp wash to push colour outward and lighten a patch.
- Press a crumpled tissue into a wet sky to lift out the shape of a cloud.
- Scratch a dry stem into a half-dry wash with the blunt end of a brush.
- Leave a strip of untouched paper as a highlight rather than painting white back in.
If a wash goes wrong, wet the area again and blot with a clean cloth. Watercolour lifts surprisingly well while the paper is still damp and the pigment has not settled.
Drying and Looking Again
Let the painting dry flat and naturally, because a hairdryer on a wet wash will push the colour into shapes you did not choose. Watercolour always dries lighter than it looks, so the paler patches will soften overnight.
Come back to the sheet the next morning before you decide anything. Many washes that looked too strong in the evening have settled into exactly the right tone by then.
Then add only what the picture still needs, on dry paper, with a light touch. A few crisp lines at the end can anchor a soft painting without spoiling its gentleness.
Keep a Loose Hand
Wet on wet watercolour is a very good teacher for anyone who likes control, because it asks you to give some of it up. The painting will never be exactly what you planned, and that is the point.
Keep a small pile of spare sheets beside you and treat the first one as practice. The technique clicks once you have flooded a few sheets and watched how the water carries the colour.
Paint the same simple view twice and compare the two. Nothing shows you the value of a damp surface more clearly than two skies made from identical colours on different evenings.