Hashtag Merry Christmas
Hello Friends — Merry Christmas and Happy Holidays to you and your families.
I’m not a big social media participant, I do enjoy following certain “hashtags” on Instagram to see quilt projects.
I signed up for Camille Roskelley’s Craftsy Class: Pre-Cut Piecing Made Simple, where she teaches you how make a hashtag quilt using a jelly roll and yardage. Pattern seems to be quite simple and the visual instructions are super terrific.
I needed/wanted a Christmas quilt but didn’t have a Christmas jelly roll on hand, instead I had a couple of Kate Spain’s Joy and Solstice charm packs and decided to make a super sized hash tag — although at my age I call it a number sign?
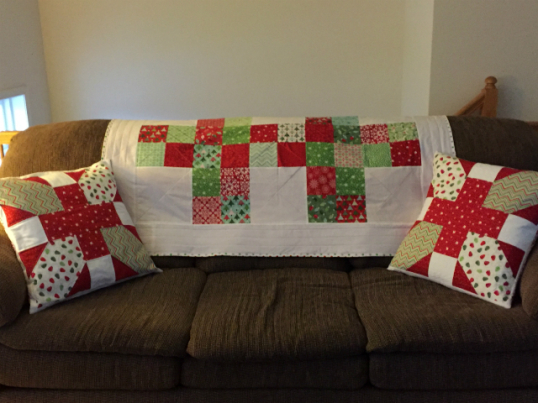
After sketching it out on graph paper this is what I came up with. Quilt measures 56 x 56 inches.
Hashtag Super Size
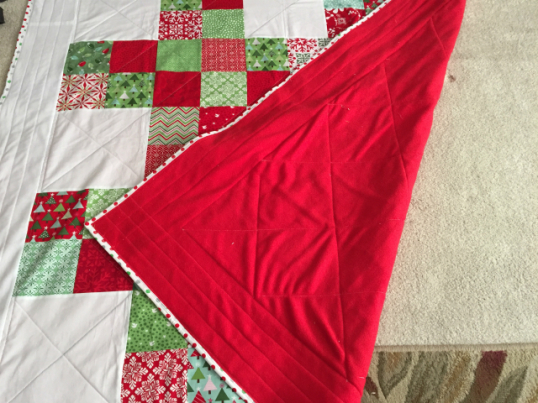
Fleece is a fabric that has a pile and can be found mostly in sports wear and jackets. I’ve sewn with fleece in the past making sweat pants, scarves and blankets. I find it a joy to sew with because it doesn’t fray and stitching mistakes don’t show ! Because of my blanket experience I thought I would try fleece as a quilt backing. We are moving to Florida in a few months so I decided to not use batting with the fleece.

fleece backing
Here’s a quick tutorial if you would like to make a Super Sized Hashtag Quilt for yourself.
For a 56 x 56 inch quilt – 5 x 5 setting
Fabric:
- 2 charm packs (5 x 5 inch squares) you will use 64
- 2 yards of background fabric (will have plenty left over)
- 1/2 yard for binding
- 2 yards fleece (60 inches wide) for quilt back
Cutting
- Background fabric – WOF = width of fabric
- 3- 9 1/2 x WOF strips – sub-cut into nine (9)- 9 1/2 x 9 1/2 squares
- 6 – 5 1/2 x WOF strips for borders
- Binding fabric
- 7 – 2 1/2 x WOF strips
Assembly – all seams are 1/4 inch
- arrange and sew the 64 five inch squares into sixteen (16)- 4 patches; completed 4 patch block should measure 9 1/2 inch square.
- Arrange by row as follows: B = Background 9 1/2 x 9 1/2 square 4 = 4 patch square
- Row 1 – B 4 B 4 B
- Row 2 – 4 4 4 4 4
- Row 3 – B 4 B 4 B
- Row 4 – 4 4 4 4 4
- Row 5 – B 4 B 4 B
- Sew together blocks in each row. Press seams open.
- Join rows together. Press seams open.
- BREATHE – quilt center is finished?
- Borders
- cut 2 of your 5 1/2 inch x WOF strips in half.
- Sew one of the half pieces to the ends of each of the four (4) remaining border strips.
- Attach the left and right side borders to your quilt center; trim extra fabric on ends
- Attach top and bottom borders to your quilt center; trim extra fabric on ends
- Starch and press quilt top
- Layer, Mark & Baste
- Lay fleece backing right side down
- Lay Quilt Top right side up on backing
- I used masking tape to create diagonal lines that formed an “X” through each block. If you are unfamiliar with using masking tape as a quilting marking tool I recommend watching this video by Leah Day.
- Pin base with safety pins ( or your preferred method)
- Quilt
- I used my walking foot to stitch along side the masking tape.
- In the borders I did straight line quilting in random widths
- Binding
- Join your seven (7) strips of 2 1/2 x WOF
- bind using your preferred method — I prefer machine binding and this is the tutorial I use.
I use my hashtag quilt as throw for our couch — of course I had to have matching pillows!

2016 Hashtag Charm Quilt

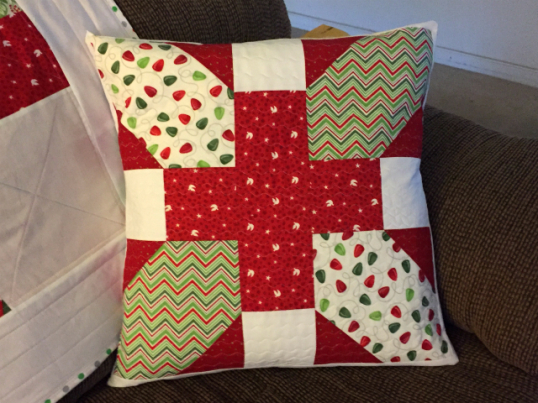
X Plus Quilted 20 inch pillow
Using Amada Rolfe’s you tube tutorial for the X Plus Quilt Block as my inspiration, I made two 20 inch pillows. Now I’m set for binge TV watching — gotta get caught up on my shows!
Thanks for stopping by!
